If you are a cycle club or an event organiser you’ll need to first register you’re organisation as a Tourism Operator with The Australian Tourism Data Warehouse (ATDW) before you can begin adding your events.
Step One – Log Into Your ATDW Account
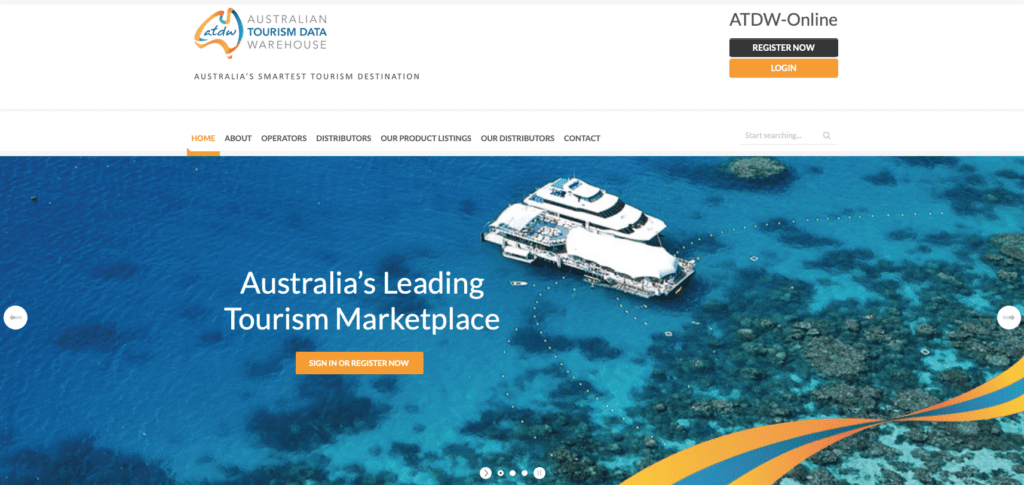
Once you have an ATDW account jump on atdw.com.au and hit the orange “LOGIN” button top right of the screen to begin adding your events.
Before you start the process, pull together everything you’ll need for each event you want to add:
- Event Name
- Dates
- Event Description inc all relevant details
- Event website and contact points
- Venue Address (google map it first to get the actual spot as some mtb parks are not placed accurately)
- Registration link
- Images (Minimum photo size is 1600 x 1200 pixels and landscape in orientation)
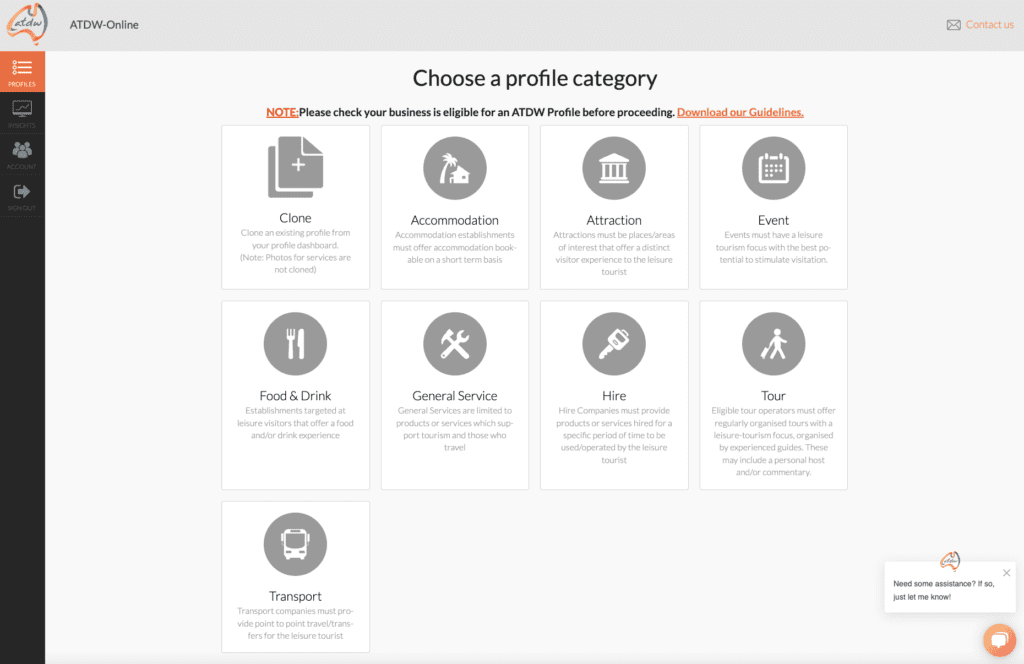
Step Two – Select Event Profile Category
ATDW refers to listings as “profiles” and breaks them down in to categories. Simply hit the “Event” tile (see below):
At each step of the way there is guidance information on the right of the screen. Use this to guide you when you first start out.
Step Three – Basic Info
Name & Description
Your description should depict what visitors can experience at your event. Describe the key highlights of your event and why people should register. Try to explain this in just one or two sentences.
- The first sentence should begin with your event’s name and location. Don’t assume people know about you or your event so include the words “mountain biking” and your event discipline ie “Gravity Enduro”.
- The second paragraph should give more detailed information on the event. What’s the format, what categories are there? What are the food and drink options? Is this event family friendly?
- In the final paragraph you may want to include some ‘how to get there’ information and details on how tickets can be purchased (do not include booking URL).
Things to leave out of your description:
- Do not use first person language (‘we’ or ‘our’)
- Abbreviations or slang
- Dot points
- Symbols (&, !!, @)
- Do not include contact details (Call Geoff to book on 03..)
- Spell out numbers from one to ten and use figures for 11 and above
- Pricing (Adult $30, Concession $20)
- Website links (https://autumnfestival.com)
- Unnecessary capitalisation – only use for names, regions or specific place
Step Four – Select Event Type
For most mountain bike events you’ll be selecting the “Sporting Events” option.

Step Five – Add Venue Details
Provide the location details of your event. If your event is taking place at multiple locations, then write ‘Various venue locations’ in the venue field and enter the name of the main suburb in the Suburb field.
Always check that the drop pin is in the correct location on the map.
Individual events must be listed separately with their own address and dates.

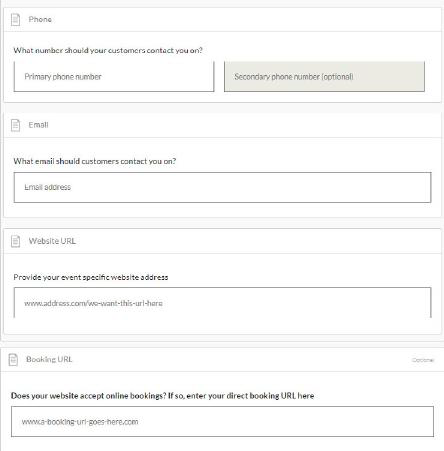
Step Six – Add Contacts
Enter your event contact details. These are the details that will appear on your listing. You need to provide at least one point of contact in your listing.
Phone: Enter a minimum of one phone number for your event. Enter the phone number in full and do not use a space between the area code. For example: 0361234567 or 0412312312
Email: Remember to include the @ symbol in the email address.
Website: Enter the website for your event – do not put a Facebook event page (TIP open up your website in a new browser tab and copy and paste the url so you know its correct!)
Booking URL: Add your registration link here ie EventBoss or Raceresults
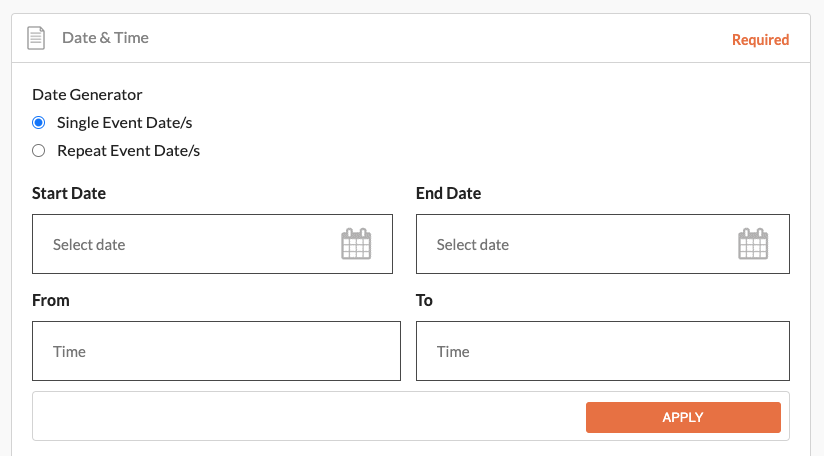
Step Seven – Date & Time
Event Confirmed
If the dates for your event are to be confirmed, or if your event is awaiting licenses or permits to be approved, select ‘No’.
Note: when all dates and permits are finalised it’s really important to log in and update your event as confirmed by selecting ‘Yes’.
Frequency

Most mountain bike events are Once Only Events. These can include single day events, or events that take place over a defined time period.
Only select Daily Events if your event runs every day throughout the year. Example: Floriade runs every day for one month. This festival is an Annual Event, not a daily event.
Note: Event profiles with a Once Only frequency will be automatically disabled at the end of your event and removed from your profile dashboard.
Date & Time
Once Only or Annual Events
Select ‘Once Only’ or ‘Annual’ if your event is a single day event, and/or if it runs at the same time on consecutive days.
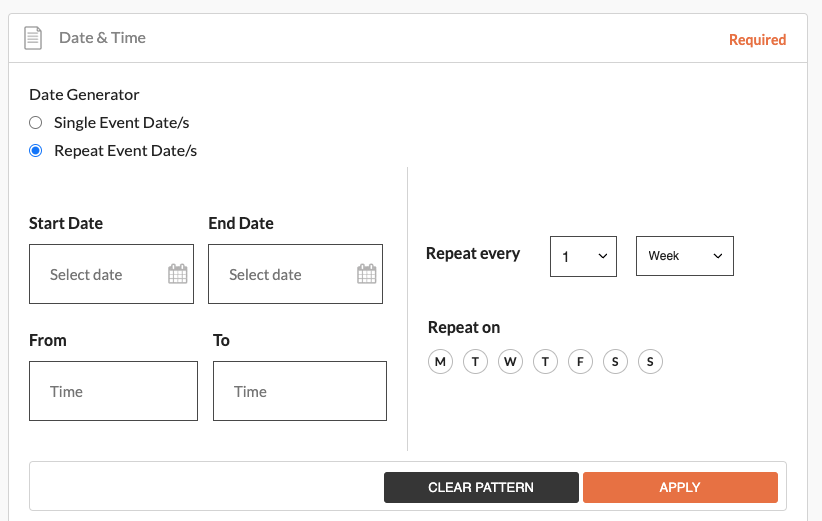
Regular Events
Regular events or repeating events tend to be used for weekly or monthly events that repeat on a particular day, such as skills training or a club series (consider adding as seperate events if different formats).
- Select Regular, then select the start and end dates of your event.
- Move to Repeats and choose from Weekly or Monthly.
- Then move to the Every field and select whether that pattern occurs every 1, 2, 3 or 4 weeks/months.
- Add quarterly events by choosing Monthly, Every 3 Months.
- Then select the days of the week that apply to the times you’ve added in the From and To fields.
Once you click Apply, you’ll see the information appear in a calendar view.
Irregular event dates
If your event starts at different times on different days, you have two options.
- Option 1 – Click on the date within the calendar view to change the times or add a new single date. The chosen date will turn black. Either click the X to remove a time slot, use the drop down arrows to update the time, or click Add another time if there is another session to be added on that day. This is also the best way to update any existing event dates.
- Option 2 – Enter one pattern at a time.
- Remember to click the ‘Apply’ button for each pattern of event dates.
Need to start again?
If all your dates and times are incorrect, click the links for Clear calendar & Confirm, then start again.
Step Eight – Accessibility Info
Tick at least one of the below options.
- Actively welcomes people with access needs.
- Does not cater for people with access needs.
- Disabled access available, contact operator for details.
If you select ‘Actively welcomes people with access needs’, you will be presented with optional
secondary information to select. It is recommended that you provide as much information in this section as possible so that customers can make informed decisions.
Step Nine – Event Photos
Photo guidelines
Each listing must have at least one photo that meets the following image requirements:
- Minimum photo size is 1600 x 1200 pixels
- Landscape (horizontal) orientation only, not portrait
- .jpg or .png format only
- Maximum photo size is 10MB
- Images must showcase your event and appeal to your chosen market
- Posters, brochures, logos or photos with written text look bad and are rarely accepted
- Alternative Text (Alt text) is mandatory. Write a brief description of what is in the photo. This benefits the visually impaired.
- Never use images you don’t have permission to use and Include image copyright information along with the ALT text above.
How To Upload Photos
- In the box, click on the orange text click to upload or drag your image file into the box.
- You can upload multiple images at once by selecting these within your files.
- Once the image has loaded enter a caption and other information (Alt text is mandatory).
- You can then adjust the image crop for square and landscape view by moving the thin blue line (your image will be cropped to this view on certain pages).
- You can now click save photo
To edit or adjust the photo, click on the photo.
Once uploaded, organise your photos by dragging them into your preferred order.
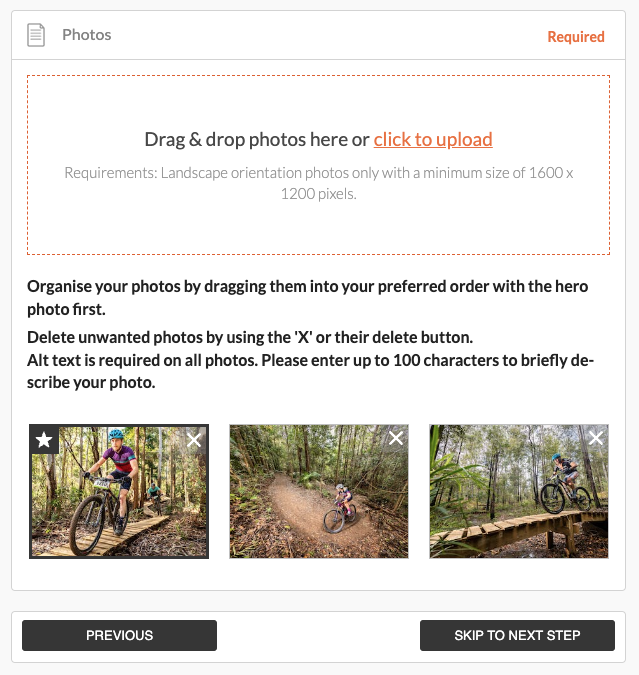
The image with the star symbol will appear as the ‘hero’ on ATDW distributor websites.
Click X to remove a photo. A maximum of ten images are permitted.
If you are having trouble uploading your photo, please refer to this guide or contact us for help.
All mandatory fields have now been completed. Complete the additional optional steps to enhance your listing. Optional fields can be updated at any time.
Step Ten – Optional Fields
- Videos
- Ticket Prices
- Internet access
- Facilities
- Memberships
- Accreditation
- Social accounts
Videos
Enter a valid Youtube or Vimeo link (URL).
For example:
Youtube: http://www.youtube.com/watch/xx
Vimeo: http://www.vimeo.com/xx
Once uploaded, arrange the videos by dragging them into your preferred order. The image with the star symbol will appear first on ATDW distributor websites. Click X to remove a video. A maximum of ten videos is allowed.
Tickets & Pricing
What are the lowest and highest ticket prices you offer customers who book directly with you?
Enter your typical rates so your customers can understand the cost.
Only tick ‘This event is free’ if it is free for all customers.
Use the COMMENT field to add extra information related to the price. E.g. child under 10 free, seniors’ discounts etc.
Facilities
Select any facilities that are available to your guests at the event.
Memberships
Does your event have a hold any memberships?
Accreditation
Is your event accredited with any industry bodies.
Social Media Accounts
Where can customers find your event on social media?
Final Step – Send For Review
Getting your listing published
Once all the mandatory steps have been completed, click on summary to review all of your listing information and make any final changes. To navigate away from the summary screen, click on one of the headings on the menu.
Once you are ready to submit your listing click send for review. If any mandatory fields have not been completed the pop-up window will provide further instructions.
Your local tourism association ie Visit Canberra or Destination NSW will check that your listing meets the requirements before publishing. This usually takes 1-2 business days.
From there, you will receive an email to confirm that your listing has been approved and is live on the ATDW distribution network.
The Start List updates its listings everyday so your event should appear after 24-48 hours.
IMPORTANT INFORMATION: Keep your listing up to date. Listings automatically expire if they are not updated every 12 months. You will receive an email to remind you of the upcoming expiry date.
Additional information
- Save time when creating multiple listings by using the clone function. This creates a copy of an existing listing within your dashboard to edit and send for review. The clone function can be found on the listing category selection page or within the settings menu of a listing.
- Additional users can be added to an account by clicking on the Account tab on the left hand side.
- ATDW-Online is accessible on mobile, tablet, laptop or desktop devices. Larger screens provide the best user experience.